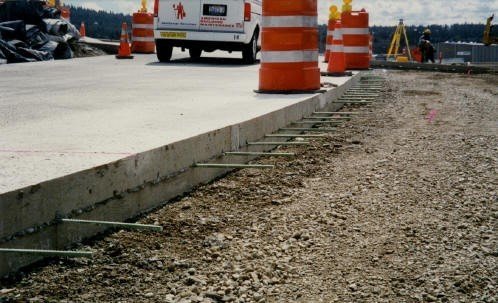
1. ROADS & PAVEMENTS:
- Road: Road engineering involves the design, construction, and maintenance of roadways to ensure safe and efficient transportation. Our key aspects include:
- Planning and Design: Our engineers assess traffic flow, environmental impact, and terrain to plan optimal road layouts. Factors like curves, slopes, and intersections are carefully considered.
- Materials: Our experts select appropriate materials such as asphalt, concrete, or gravel based on traffic volume, climate conditions, and durability requirements.
- Construction: Our team supervise the laying of materials, compaction, and surface finishing to ensure longevity and safety.
- Maintenance: Regular inspections and repairs to address wear and tear, potholes, and drainage issues.
- Pavements: Pavements refer to the surface layer of roads and sidewalks, designed to support vehicular and pedestrian traffic. Our key considerations include:
- Types of Pavements: Asphalt (bitumen) and concrete are common materials used for pavements. Each has its advantages in terms of cost, durability, and ease of maintenance.
- Design: Our engineers calculate pavement thickness, considering factors like traffic load, climate conditions (freeze-thaw cycles), and soil characteristics. Proper drainage design prevents water from weakening the pavement structure.
- Construction: Precise mixing, laying, and compacting techniques are critical to ensure uniform density and strength. Quality control measures during construction are essential to avoid future issues.
- Maintenance: Regular inspections for cracks, surface distress, and drainage problems. Timely repairs (patching, resurfacing) extend pavement life and maintain safety.

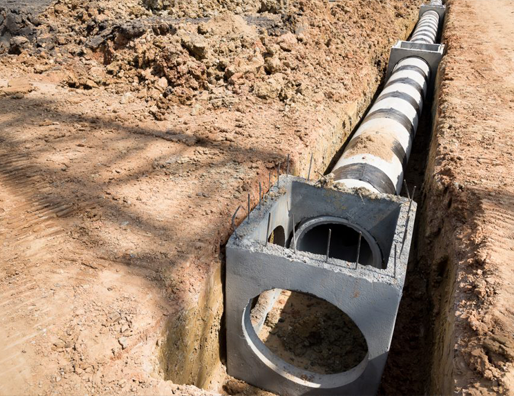
2. DRAINAGE & RETAINING STRUCTURE
- Foundation Preparation: Prepare the foundation with a stable base and level surface.
- Block Placement: Stack precast concrete blocks or other modular units to create the retaining wall. Interlocking blocks or a keying system may be used to stabilize the structure.
- Backfill and Drainage: Backfill with gravel or suitable material and incorporate drainage measures to manage water pressure behind the wall.
· Planning and Design:
- Site Assessment: Our experts evaluate the site’s topography, soil conditions, and water flow patterns. Identify areas prone to erosion or flooding and determine where drainage and retaining structures are needed.
- Design Specifications: We Develop detailed designs for the drainage and retaining structures, including layout, materials, dimensions, and construction methods. Our team ensure compliance with local regulations and engineering standards.
- Permits and Approvals: We obtain necessary permits and approvals from local authorities, especially if the work affects public spaces or involves significant alterations to natural watercourses.
· Drainage Installation:
- Surface and Subsurface Drainage Systems:
- Surface Drainage:
- Grading: Grade the surface to direct water flow towards drainage points. Ensure proper slope to facilitate natural runoff.
- Drainage Channels: Construct channels or ditches to collect and convey surface runoff. Channels may be lined with concrete or geotextile fabrics to prevent erosion.
- Catch Basins: Install catch basins or inlets at low points to capture and filter surface runoff. Connect catch basins to underground drainage pipes.
- Subsurface Drainage:
- Trenching: Excavate trenches for subsurface drainage pipes. The depth and width depend on the design and soil conditions.
- Pipe Installation: Lay perforated drainage pipes (usually PVC or corrugated plastic) in the trenches. These pipes collect and convey groundwater to a designated discharge point.
- Gravel or Aggregate: Surround the pipes with gravel or aggregate to facilitate water flow into the pipes and prevent clogging. Cover the gravel with geotextile fabric to separate it from the surrounding soil.
· Retaining Structure Installation: There are different types of Retaining Structures such as:
- Gravity Retaining Walls:
- Excavation and Foundation: Excavate the area for the retaining wall foundation. The foundation must be deep and stable to support the wall’s weight.
- Wall Construction: Construct the wall using materials such as concrete, masonry, or stone. Gravity walls rely on their weight to resist soil pressure. Ensure proper alignment and levelling.
- Backfill and Drainage: After the wall is constructed, backfill behind the wall with soil or gravel. Install drainage pipes or weep holes to prevent water build-up behind the wall, which can cause pressure and structural damage.
- Cantilever Retaining Walls:
- Foundation and Base: Excavate for the foundation and base slab. The base should be reinforced with steel rebar to provide additional strength.
- Wall Construction: Build the cantilever wall using reinforced concrete. The wall consists of a vertical stem and a horizontal base slab that resists soil pressure through leverage.
- Backfill and Drainage: Backfill behind the wall with soil or gravel and install drainage systems to manage water pressure.
- Sheet Pile Walls:
- Sheet Pile Installation: Drive or vibrate sheet piles (steel, concrete, or vinyl) into the ground to form a continuous barrier. Sheet piles are used in situations where space is limited, or the soil is unstable.
- Lagging and Backfill: Install lagging (horizontal boards) between the sheet piles if required and backfill behind the wall.
- Segmental Retaining Walls: Quality Assurance and Testing:
- Inspection: Inspect all components during construction to ensure they meet design specifications and quality standards. Verify proper alignment, compaction, and drainage functionality.
- Testing: Conduct tests for drainage efficiency and wall stability. For retaining walls, ensure there are no signs of deformation or failure.
· Finalizing and Maintenance:
- Surface Restoration: Restore the surface area affected by construction, including replanting vegetation or paving if required.
Ongoing Maintenance: Develop a maintenance plan for regular inspections and upkeep of the drainage and retaining structures. Address any issues such as erosion, blockages, or structural damage promptly.

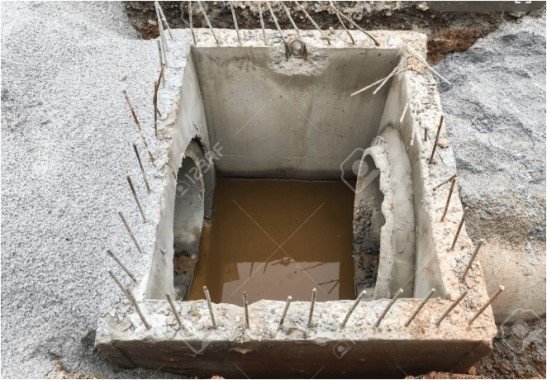
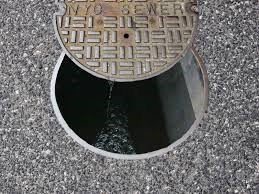
3. SEWERAGE WORKS
· Planning and Design:
- Site Assessment: Our experts evaluate the topography, soil conditions, and existing infrastructure. Determine the best routes for sewer lines and identify potential obstacles.
- System Design: We develop detailed plans for the sewer system, including pipe sizes, material types, and layout. This includes gravity sewers, pumping stations, and treatment facilities.
- Regulatory Approval: We obtain necessary permits and approvals from local authorities and regulatory agencies. Ensure compliance with environmental and safety standards.
· Excavation and Trenching:
- Excavation: Dig trenches to lay the sewer pipes. The depth and width of the trenches depend on the pipe size and the need for access. For larger systems, heavy machinery like excavators is used.
- Trench Safety: We implement safety measures such as shoring or trench boxes to prevent collapses and protect workers.
· Pipe Installation:
- Pipe Laying: We provide and install sewer pipes in the trenches according to the design specifications. Ensure pipes are laid at the correct slope for gravity flow.
- Jointing and Sealing: We connect pipes using joints, gaskets, or welding, depending on the material. Proper sealing is essential to prevent leaks and infiltration.
- Pipe Bedding: We place a bedding material (like sand or gravel) under and around the pipes to support them and provide stability.
· Construction of Access Structures:
- Manholes: We install manholes at regular intervals along the sewer lines for maintenance and inspection access. Manholes should be constructed to accommodate future inspection and cleaning needs.
- Pumping Stations: If the system requires lifting wastewater to higher elevations, construct and install pumping stations, including pumps, control panels, and electrical systems.
· Backfilling and Compaction:
- Backfilling: Once the pipes and access structures are in place, backfill the trenches with soil or other approved material. Ensure that the backfill is compacted to prevent future settlement.
- Compaction: We use compacting equipment to ensure the soil around the pipes is firmly packed, reducing the risk of ground subsidence.
· Connection to Existing Systems:
- Interconnections: We connect the new sewer lines to existing infrastructure, such as existing sewer mains or treatment plants. Ensure that all connections are properly sealed and tested.
- Testing: Our team conduct pressure and leakage tests to verify the integrity of the sewer lines and connections.
· Surface Restoration:
- Paving and Landscaping: We restore the surface area affected by construction, including repaving roads and replanting vegetation. Ensure the restored surface matches the surrounding area.
- Site Clean-up: Remove any construction debris and clean up the site to ensure it is safe and presentable.
· Commissioning and Inspection:
- System Testing: We perform final inspections and tests on the entire system to ensure it operates as designed. This may include flow testing, pressure testing, and operational checks of pumps and valves.
- Quality Assurance: Verify that all components meet design specifications and regulatory standards. Address any issues identified during testing.
· Operation and Maintenance:
- Operational Training: Our team train maintenance staff on the operation and maintenance of the new sewerage system, including how to handle emergency situations.
- Maintenance Plan: We develop a maintenance schedule for regular inspections, cleaning, and repairs to ensure the system remains functional and efficient over time.
4. SIGN CRAFTS INSTALLATION
- Site Survey and Planning:
- Site Assessment: We evaluate the location where the sign will be installed, considering visibility, accessibility, and local regulations.
- Measurement and Planning: Our team measure the dimensions of the installation area and plan the placement of the sign for optimal visibility and impact.
- Permitting and Regulations:
- Permit Acquisition: We obtain necessary permits and approvals from local authorities if required for installing the sign.
- Compliance: We ensure the sign design and installation meet local zoning regulations, building codes, and safety standards.
- Preparation and Fabrication:
- Sign Fabrication: We construct or procure the sign according to approved designs and specifications.
- Preparation: We prepare the installation site by clearing obstacles, ensuring access for installation equipment, and addressing any site-specific challenges.
- Installation Process:
- Mounting: Our experts securely mount the sign to its intended surface, which could be a building facade, pole, ground mount, or other structures.
- Electrical Connection: If the sign is illuminated, connect wiring and power sources according to electrical codes and safety standards.
- Alignment and Levelling: We ensure the sign is level and properly aligned for aesthetic appeal and readability.
- Testing and Adjustments:
- Functionality Check: Test lighting (if applicable) and ensure all components of the sign are functioning correctly.
- Adjustments: Our team make any necessary adjustments to ensure the sign meets visual and functional requirements.
- Final Inspection: We conduct a final inspection to verify that the installation meets design specifications, safety standards, and client expectations.
· Considerations for Sign craft Installation:
- Material Selection: We choose materials that are durable, weather-resistant, and suitable for the installation environment (e.g., outdoor vs. indoor).
- Safety: We follow safety protocols during installation, especially when working at heights or with electrical components.
- Aesthetics and Branding: Our team ensure the sign design aligns with the client’s branding and enhances the visual appeal of the location.
- Maintenance: We provide recommendations for ongoing maintenance to extend the lifespan and appearance of the sign.

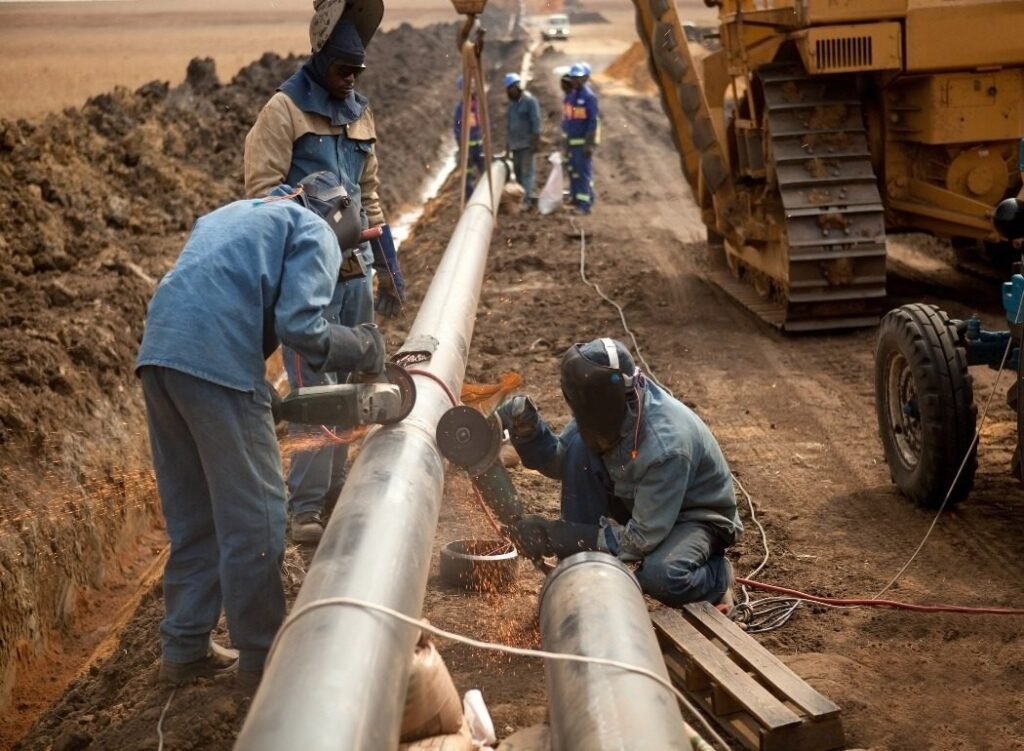
5. GAS STATIONS AND PIPELINES INSTALLATION:
· Planning and Design:
- Route Survey: We conduct a survey to determine the optimal route for the pipeline, considering factors like terrain, existing infrastructure, and environmental impact.
- Design Specifications: We develop detailed plans and specifications for the pipeline, including pipe material, diameter, pressure ratings, and the locations of compressor stations, valves, and other infrastructure.
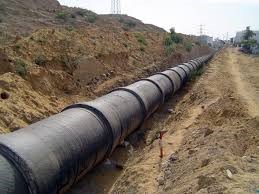
· Excavation and Trenching:
- Excavation: Dig trenches along the pipeline route. The depth and width depend on the pipe size and the need for access. For large pipelines, heavy machinery such as excavators is used.
- Trench Safety: Implement safety measures to protect workers and prevent trench collapses, such as shoring or trench boxes.
· Pipe Fabrication and Delivery:
- Pipe Manufacturing: Pipes are manufactured to meet specific design criteria, including material strength and pressure ratings. Common materials include steel and high-density polyethylene (HDPE).
- Transportation: Transport the pipes to the construction site. Pipes are often delivered in sections and may require temporary storage.
· Pipe Installation:
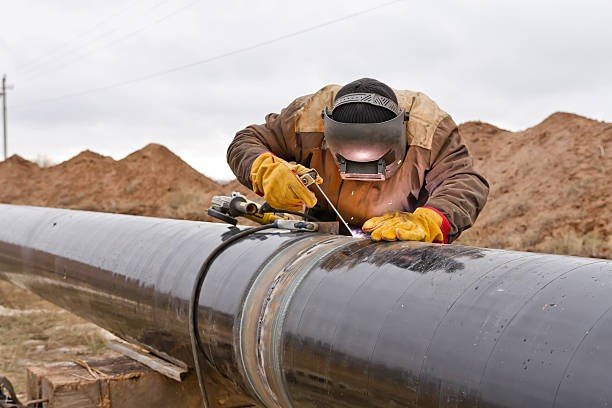
- Pipe Stringing: Lay the pipes out along the trench before installation. This involves aligning the sections and preparing them for welding or joining.
- Joining Pipes: We connect the pipe sections using welding or mechanical couplings. For steel pipes, welding is commonly used, while HDPE pipes are typically joined with heat fusion or electrofusion.
- Inspection: Inspect welds and joints for quality and integrity. Non-destructive testing methods like ultrasonic or radiographic inspections may be used.
· Pipe Coating and Insulation:
- Coating: We apply protective coatings to the pipes to prevent corrosion. Common coatings include epoxy or polyurethane. For pipelines buried in soil, external coatings help prevent deterioration.
- Insulation: In cold climates, pipes may be insulated to prevent the gas from cooling and condensing.
· Trench Backfilling and Compaction:
- Backfilling: Once the pipes are installed and inspected, backfill the trench with soil or other approved material. Ensure that the backfill is placed in layers and compacted properly.
- Compaction: We use compacting equipment to ensure that the soil around the pipes is firmly packed, reducing the risk of subsidence.
· Construction of Supporting Infrastructure:
- Compressor Stations: If the pipeline requires pressurization, construct and install compressor stations along the route. These stations include compressors, control systems, and power supply.
- Valve Stations: Install valve stations to control the flow and pressure of the gas. Valves are used for isolating sections of the pipeline and managing operational changes.
- Metering Stations: Install metering stations to measure the flow rate and pressure of the gas for monitoring and billing purposes.
· Testing and Commissioning:
- Pressure Testing: We conduct hydrostatic testing by filling the pipeline with water and pressurizing it to check for leaks and ensure structural integrity.
- System Testing: Our team perform operational tests to verify that all components, including valves and compressor stations, are functioning correctly.
- Commissioning: We gradually introduce gas into the pipeline and monitor the system for any issues during the initial operation phase.
· Ongoing Operation and Maintenance:
- Monitoring: We continuously monitor the pipeline for pressure, flow, and any potential leaks using SCADA systems and other sensors.
- Maintenance: We perform regular inspections, cleaning, and maintenance to ensure the pipeline remains in good condition and operates safely.
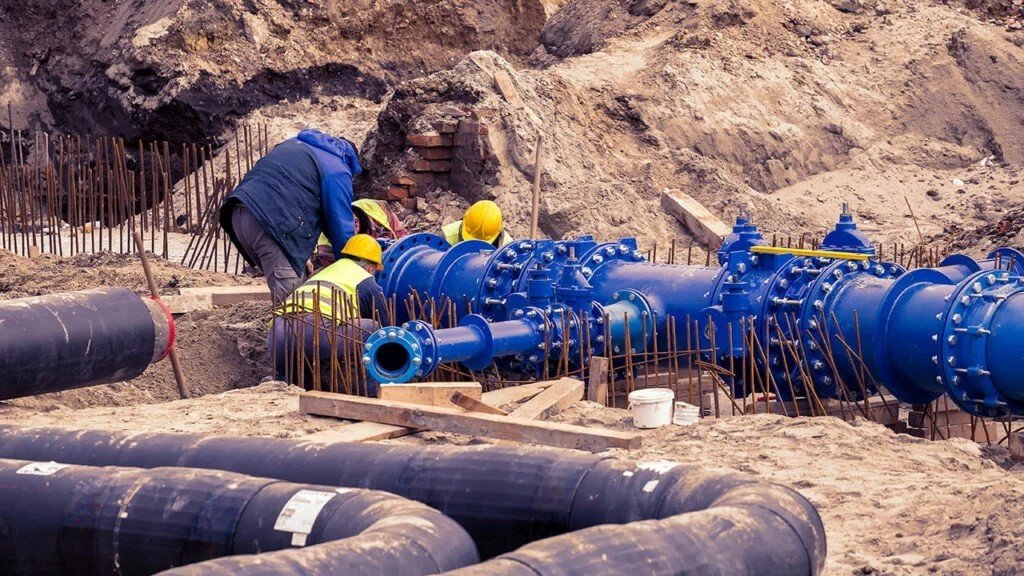
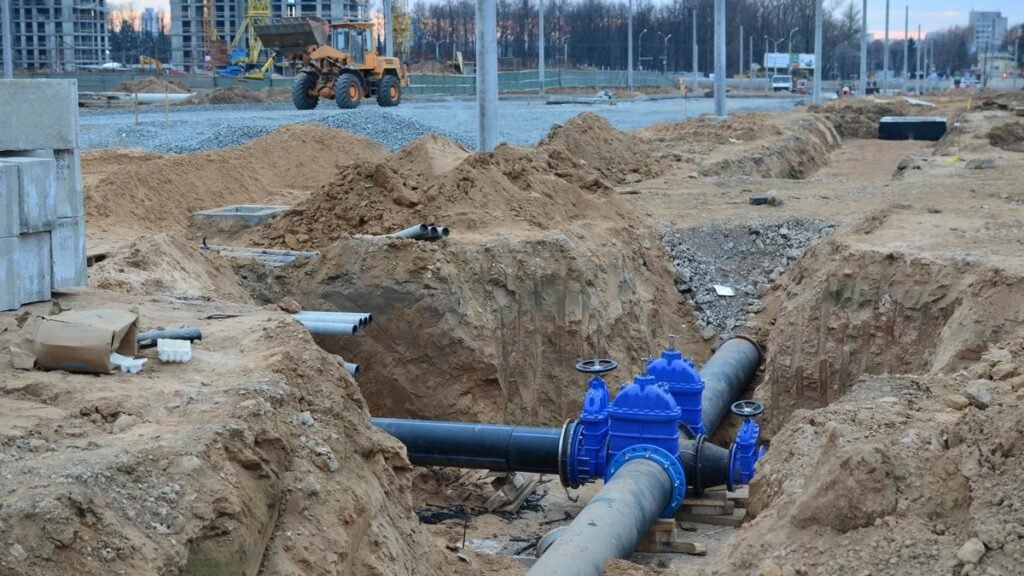
6. WATER SUPPLY SYSTEM:
· Planning and Design:
- Site Assessment: We conduct a survey to assess water demand, source availability, and site conditions. Consider factors such as groundwater levels, soil type, and accessibility.
- System Design: We develop a detailed design for the water supply system, including pipeline layout, pump specifications, storage tanks, and distribution networks.
- Installation of Water Supply Infrastructure:
- Pipeline Installation:
- Trenching: We excavate trenches along the pipeline route. The depth and width depend on the pipe size and local conditions.
- Pipe Laying: We provide and install pipes made from materials like PVC, HDPE, or ductile iron. Ensure proper alignment and connection of joints.
- Backfilling: After laying the pipes, backfill the trenches with soil, compacting it to prevent future settlement.
- Pump and Storage Systems:
- Pump Installation: We supply and install pumps based on the system design. Pumps may be centrifugal, submersible, or other types depending on the water source and pressure requirements.
- Storage Tanks: We place storage tanks at elevated positions or install pressure vessels to ensure consistent water supply and pressure.
- Pump Installation: We supply and install pumps based on the system design. Pumps may be centrifugal, submersible, or other types depending on the water source and pressure requirements.
TUBE WELLS AND SOLAR TUBE WELLS INSTALLATION:
- Tube Well:
a. Site Selection and Design:
- Location: We choose a location with adequate groundwater availability. Consider factors like distance from contamination sources and ease of access for drilling equipment.
- Design: We determine the depth and diameter of the tube well based on the groundwater table and expected yield.
b. Drilling and Construction:
- Drilling: We use rotary or percussion drilling rigs to bore a well into the ground. The depth of the well depends on the groundwater table and geological conditions.
- Casing Installation: We insert a casing (usually PVC or steel) into the drilled borehole to prevent collapse and contamination.
- Screen Installation: We install a well screen at the bottom of the casing to allow water to enter while filtering out sand and sediment.
- Gravel Pack: We surround the screen with a gravel pack to improve water flow and filter out finer sediments.
c. Pump Installation:
- Pump Selection: We choose a pump suitable for the depth and yield of the well. Submersible pumps are commonly used for tube wells.
- Installation: We supply and install the pump at the appropriate depth within the well and connect it to the water supply system.
d. Testing and Commissioning:
- Water Testing: Our experts test the water quality for contaminants and suitability for use.
- Pump Testing: We test the pump performance to ensure it delivers the required flow rate and pressure.
- Solar Tube Well:
a. Planning and Design:
- Site Assessment: We evaluate the site for solar energy potential and water needs. Ensure adequate sunlight exposure for the solar panels.
- System Design: Our experts design the solar tube well system, including solar panels, pump specifications, and battery storage if needed.
b. Installation:
- Solar Panels: Our Team mount solar panels on a structure that provides optimal exposure to sunlight. This can be a fixed mount or a tracking system.
- Solar Pump: We provide and install a solar-powered pump designed to operate with direct current (DC) from the solar panels. Ensure compatibility with the well’s depth and water yield.
- Wiring and Controllers: We connect the solar panels to the pump using appropriate wiring and include a charge controller if using batteries to manage energy storage.
- Battery Storage: If the system includes battery storage, install, and connect batteries to store excess solar energy for use during low sunlight periods.
c. System Testing and Commissioning:
- Performance Testing: Our experts test the entire system, including the solar panels, pump, and water flow. Ensure that the system meets performance specifications and operates efficiently.
- Adjustments: We make any necessary adjustments to optimize system performance and water delivery.
· Maintenance and Operation:
- Routine Inspection: We regularly inspect and maintain the water supply system, tube wells, and solar components. Check for leaks, pump performance, and the condition of solar panels.
- Cleaning: We clean the well and pump components periodically to prevent clogging and ensure efficient operation.
- Repairs: We address any issues promptly, such as pump malfunctions, pipe leaks, or solar panel damage.
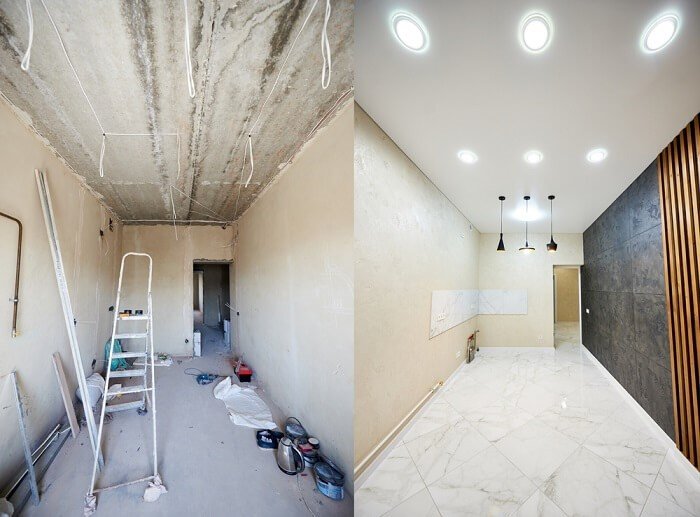
8. COMMERCIAL AND RESIDENTIAL BUILDINGS CONSTRUCTION:
- Commercial Buildings:
a. Site Preparation:
- Surveying: We conduct site surveys to map out the property, assess soil conditions, and identify existing utilities and infrastructure.
- Clearing and Grading: Remove vegetation, debris, and level the site to prepare for foundation work. Ensure proper drainage to prevent water accumulation.
b. Foundation Installation:
- Excavation: We excavate the foundation trenches or pits according to the building design.
- Foundation Type: We install the appropriate type of foundation, which may include:
- Shallow Foundations: Such as spread footings or mat foundations.
- Deep Foundations: Such as piles or caissons for areas with poor soil conditions.
- Formwork and Reinforcement: Our team set up formwork and place reinforcement bars (rebar) to strengthen the concrete.
c. Structural Framework:
- Columns and Beams: We erect columns and beams to form the building’s structural framework. Materials may include steel, concrete, or a combination.
- Floors and Slabs: We install floor slabs and decking, which may be pre-cast or poured on-site.
d. Envelope and Roofing:
- Exterior Walls: Our team construct exterior walls using materials like steel studs, concrete panels, or masonry.
- Windows and Doors: We provide and install windows and doors, ensuring proper sealing and weatherproofing.
- Roofing: We install the roofing system, which may include trusses, rafters, and roofing materials like metal, asphalt shingles, or tiles.
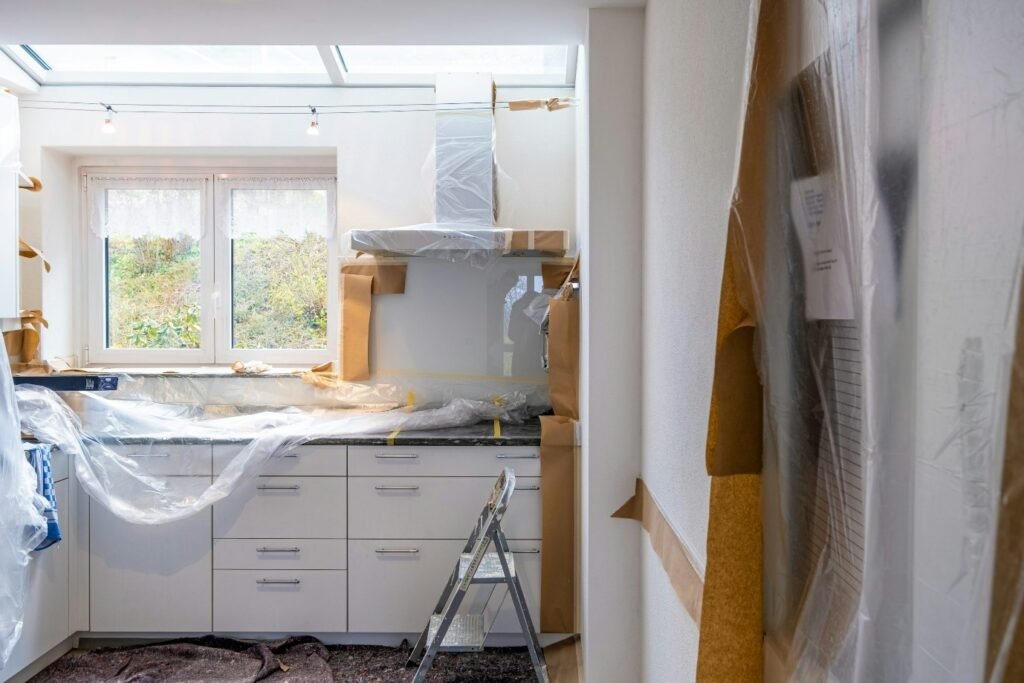
e. Interior Fit-Out:
- Partitioning: We construct interior walls and partitions based on the layout plan.
- Ceilings and Flooring: We supply and install ceilings (including dropped ceilings) and flooring materials such as tile, carpet, or hardwood.
- HVAC Systems: We install heating, ventilation, and air conditioning systems, including ductwork, air handlers, and thermostats.
f. Electrical and Plumbing Systems:
- Electrical Wiring: We install electrical wiring, outlets, switches, and lighting fixtures. Ensure compliance with electrical codes and safety standards.
- Plumbing: We install plumbing systems, including pipes, fixtures, and water heaters. Connect to municipal water and sewage systems as needed.
g. Finishing and Exterior Works:
- Painting and Decorating: Our team apply interior and exterior paint, finishes, and other decorative elements.
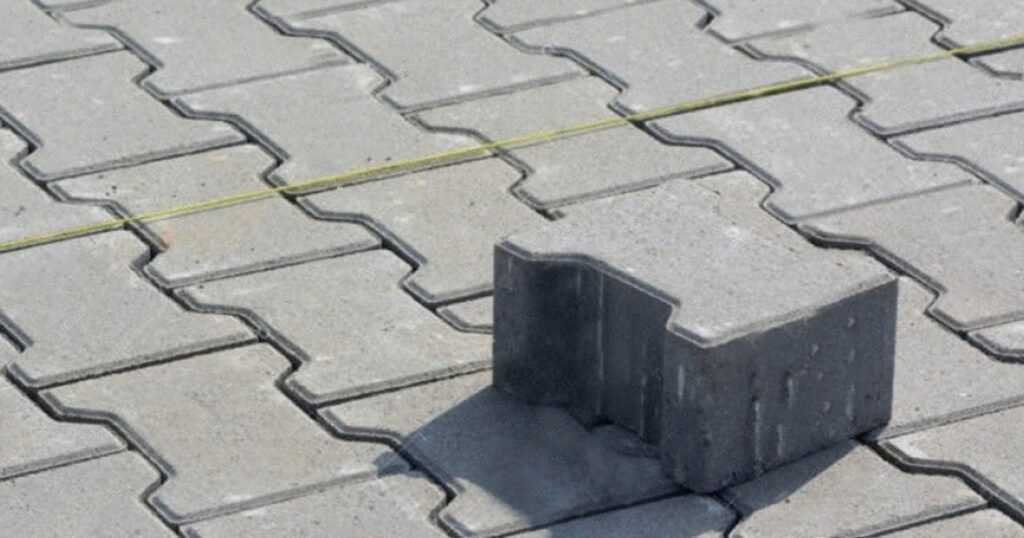
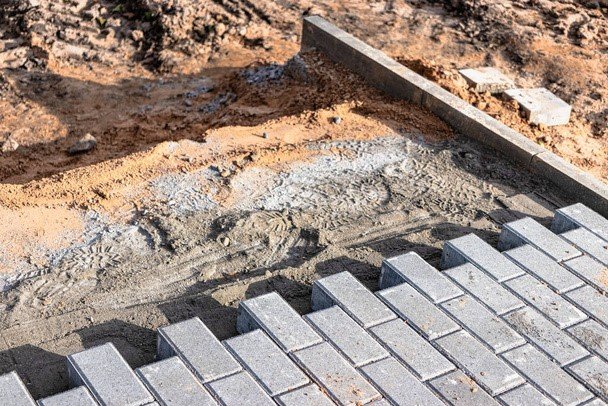
- Landscaping: Our experts complete landscaping work, including planting, paving, and installation of outdoor features such as signage and lighting.
- Residential Buildings:
a. Site Preparation:
- Surveying: Similarly, like commercial buildings, we conduct a detailed survey to determine the layout and foundation requirements.
- Clearing and Grading: We prepare the site by clearing debris, grading the land, and ensuring proper drainage.
- Foundation Installation:
- Excavation: Dig foundation trenches or footings according to the house plans.
- Foundation Type: Install foundations such as:
- Shallow Foundations: Including footings and stem walls.
- Crawl Spaces or Basements: If included in the design, excavate and construct crawl spaces or basements.
- Formwork and Reinforcement: Set up formwork and place rebar for concrete foundations.
c. Structural Framework:
- Framing: Our team construct the building’s frame using wood or metal studs. This includes walls, floors, and roof framing.
- Sheathing: Install sheathing on the exterior walls and roof to provide structural support and a base for finishing materials.
d. Envelope and Roofing:
- Exterior Walls: We install exterior wall finishes, including siding, stucco, or brick veneer.
- Windows and Doors: Install energy-efficient windows and doors, ensuring proper sealing.
- Roofing: Install the roofing system, including underlayment and roofing materials such as asphalt shingles or metal panels.
e. Interior Fit-Out:
- Partition Walls: Our experts construct interior partition walls to define rooms and spaces.
- Ceilings and Flooring: Install ceilings and flooring materials such as laminate, tile, or carpet.
- Cabinetry and Fixtures: Install kitchen cabinets, bathroom vanities, and other built-in fixtures.
f. HVAC Systems:
- Heating and Cooling: Install HVAC systems, including furnaces, air conditioners, and ductwork. Ensure proper placement of vents and returns.
g. Electrical and Plumbing Systems:
- Electrical Wiring: Install wiring for lighting, outlets, and appliances. Ensure compliance with residential electrical codes.
- Plumbing: Install plumbing systems, including supply lines, drain lines, fixtures, and water heaters.
h. Finishing and Landscaping:
- Painting and Finishes: Our team apply interior and exterior paint, wallpaper, and other finishing touches.
- Landscaping: Our Experts complete exterior landscaping, including lawn installation, garden beds, and pathways.
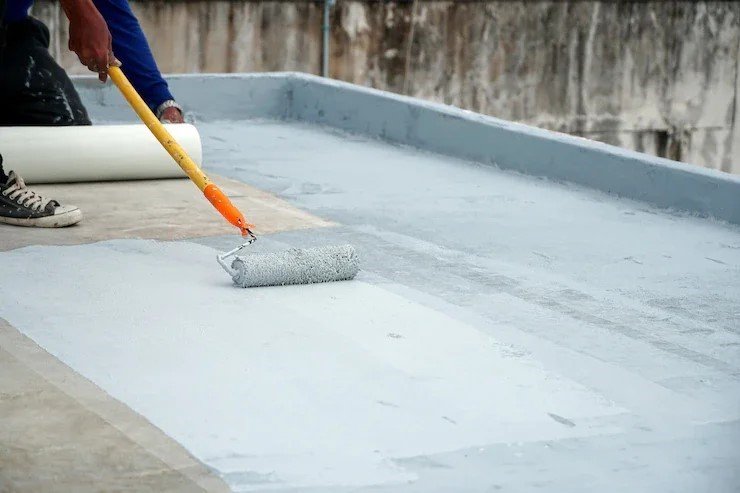
9. WATER PROOFING WORKS:
· Planning and Design:
a. Site Assessment:
- Evaluate Moisture Conditions: We assess the site’s exposure to water, including groundwater levels, rainfall patterns, and potential sources of leakage.
- Determine Areas for Waterproofing: Our experts identify critical areas that require waterproofing, such as foundations, basements, roofs, terraces, and walls.
b. Design Specifications:
- Choose Waterproofing Methods: Our team select appropriate waterproofing methods based on the structure, environmental conditions, and intended use. Common methods include liquid membranes, sheet membranes, and drainage systems.
- Compliance: We ensure that the design meets local building codes and standards for waterproofing.
· Types of Waterproofing Systems:
a. Liquid Membranes:
- Application: We apply liquid waterproofing membranes to surfaces as a liquid that cures to form a flexible, seamless barrier.
- Preparation:
- Surface Preparation: Clean and prepare the surface by removing loose material, dirt, and grease. Repair any cracks or imperfections.
- Priming: Apply a primer if required by the manufacturer to enhance adhesion.
- Application Process:
- Coating: Apply the liquid membrane using brushes, rollers, or spray equipment. Ensure even coverage and overlap at seams.
- Curing: Allow the membrane to cure as per manufacturer guidelines, typically requiring a period of several hours to a few days.
b. Sheet Membranes:
- Application: Use pre-manufactured sheet membranes that are applied to surfaces to create a continuous waterproof barrier.
- Preparation:
- Surface Preparation: Clean and level the surface. Repair any cracks and ensure it is dry and free of debris.
- Installation Process:
- Placement: Lay the sheet membrane over the surface, ensuring that edges and seams are properly aligned.
- Adhesion: Secure the membrane using adhesive or mechanical fasteners as specified by the manufacturer.
- Sealing: Overlap and seal seams with adhesive or heat welding to ensure a watertight finish.
c. Bituminous Membranes:
- Application: Utilize bituminous membranes, which are asphalt-based and often used for roofing and foundation waterproofing.
- Preparation:
- Surface Preparation: Ensure the surface is clean, dry, and smooth.
- Installation Process:
- Laying Membrane: Roll out the bituminous membrane onto the prepared surface.
- Heat Application: Use a torch or heat gun to activate the adhesive backing and secure the membrane in place.
- Sealing: Overlap seams and edges to create a continuous waterproof barrier.
d. Cementitious Waterproofing:
- Application: Apply cementitious waterproofing products that are mixed with water and applied as a slurry or thick coating.
- Preparation:
- Surface Preparation: Clean the surface and repair cracks and voids.
- Priming: Apply a primer if recommended by the manufacturer.
- Application Process:
- Coating: Apply the cementitious mixture with a brush, roller, or trowel. Ensure even coverage and fill all joints and cracks.
- Curing: Allow the coating to cure properly, typically requiring a few days.
- Waterproofing of Specific Areas:
a. Foundations and Basements:
- External Waterproofing:
- Excavation: Our team excavate around the foundation to expose the walls.
- Application: Apply waterproofing membranes or coatings to the exterior foundation walls.
- Drainage: Install drainage systems, such as weeping tiles or drainage boards, to direct water away from the foundation.
- Internal Waterproofing:
- Surface Coatings: We apply waterproof coatings or cementitious products to interior basement walls.
- Damp Proofing: Install a damp-proofing layer on floors and walls to prevent moisture ingress.
b. Roofs and Terraces:
- Flat Roofs:
- Preparation: Clean and prepare the roof surface.
- Membrane Application: Apply a waterproof membrane, such as bituminous or liquid, to create a waterproof layer.
- Protection: Add a protective layer or gravel to shield the membrane from UV rays and physical damage.
- Sloped Roofs:
- Underlayment: Install a waterproof underlayment before placing roofing materials such as shingles or tiles.
- Sealing: Ensure that all seams, joints, and penetrations are properly sealed to prevent water ingress.
c. Walls and Facades:
- Exterior Walls:
- Preparation: Clean and prepare wall surfaces.
- Coatings: Apply waterproof coatings or sealants to the exterior walls.
- Interior Walls:
- Waterproofing Paints: Use waterproof paints or coatings to prevent moisture penetration.
· Drainage Systems:
- Surface Drainage: Install surface drainage systems such as channels, grates, and catch basins to direct water away from the building.
- Subsurface Drainage: Install drainage pipes or weeping tiles around foundations to collect and redirect groundwater.
· Quality Assurance and Testing:
- Inspection: Our experts inspect the installation for adherence to design specifications and manufacturer recommendations.
- Testing: Our team conduct water tests to ensure the effectiveness of the waterproofing system and check for leaks or areas of weakness.
· Maintenance and Repairs:
- Routine Inspections: We regularly inspect waterproofed areas for signs of wear, damage, or failure.
- Repairs: We address any issues promptly by repairing or reapplying waterproofing materials as needed.

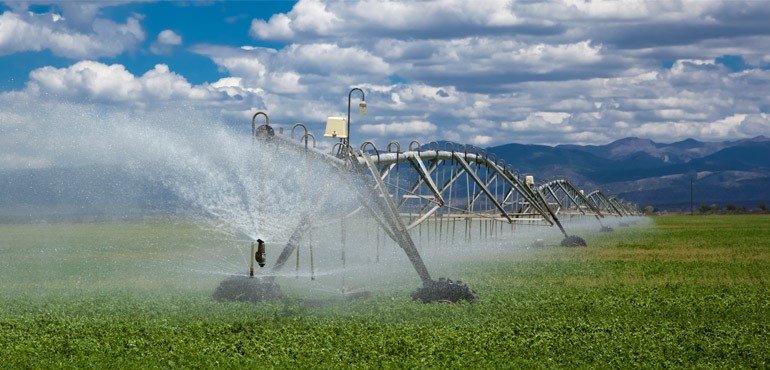
10. IRRIGATION SYSTEM:
· Planning and Design:
a. Site Assessment:
- Evaluate Water Source: We determine the available water sources (e.g., wells, rivers, reservoirs) and assess their capacity.
- Field Layout: Our experts survey the field or area to understand its layout, topography, and soil type.
- Water Requirements: We calculate the water needs of the crops or plants based on their type, growth stage, and climate conditions.
- System Type: We choose the type of irrigation system that best suits your needs (e.g., surface, drip, or sprinkler).
b. Design Considerations:
- Coverage Area: We design the system to ensure uniform coverage of the entire area.
- Water Pressure: Our team ensure that the system design accounts for adequate water pressure and flow rates.
- Automation: We consider incorporating automated controls and sensors to optimize water usage and system efficiency.
· Surface Irrigation Installation:
a. Preparation:
- Field Grading: Level the field and create contours or furrows as needed for water flow.
- Soil Preparation: Prepare the soil to ensure it is suitable for water infiltration and distribution.
b. Installation:
- Furrows/Channels: we construct furrows or channels using plods or earth-moving equipment.
- Water Supply: Our team set up the water supply system, including pipes or ditches to deliver water to the field.
- Distribution: We distribute water through the furrows or channels, ensuring proper flow and coverage.
c. Maintenance:
- Regular Inspection: Check furrows and channels for blockages or erosion.
- Repairs: Repair any damage to channels or pipes to maintain efficient water distribution.
· Drip Irrigation Installation:
a. Preparation:
- Site Layout: Our experts Map out the layout for drip lines and emitters based on plant spacing and water requirements.
- Soil Preparation: Ensure the soil is well-prepared for the installation of drip components.
b. Installation:
- Mainline Pipes: Install mainline pipes from the water source to the field.
- Filter and Pressure Regulator: Install filters to remove debris and pressure regulators to ensure consistent water flow.
- Drip Tubing: Lay out the drip tubing along the planting rows or around individual plants.
- Emitters: Install emitters at appropriate intervals to deliver water directly to the plant root zone.
- Connection: Connect the drip tubing to the mainline and ensure all fittings are secure.
c. Maintenance:
- Inspection: Regularly check for clogged emitters and leaks.
- Cleaning: Flush the system periodically to remove sediment and debris from filters and emitters.
- Adjustments: Adjust emitter flow rates as needed to match plant water needs.
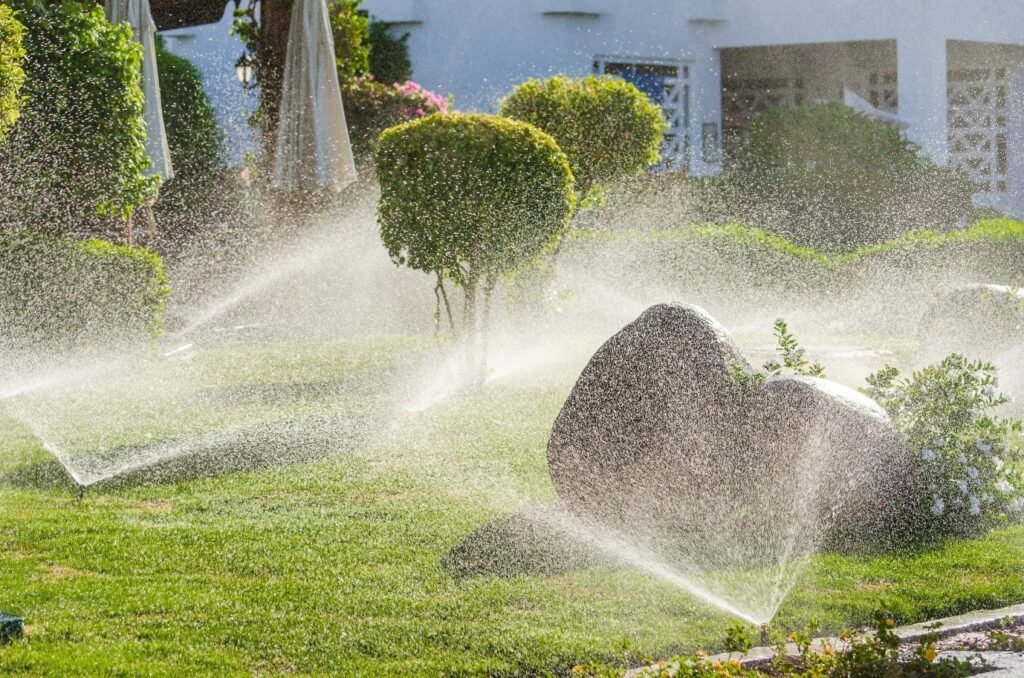
· Sprinkler Irrigation Installation:
a. Preparation:
- Site Survey: Determine the layout for sprinkler heads and the placement of pipes based on the area to be covered.
- Water Pressure: Check the water pressure to ensure it is adequate for the sprinkler system.
b. Installation:
- Main and Lateral Pipes: Install main and lateral pipes to deliver water to the sprinklers.
- Sprinkler Heads: Position and install sprinkler heads according to the design plan. Ensure they are spaced to provide even coverage.
- Valves and Controllers: Install valves and automated controllers to manage water flow and timing.
- Testing: Test the system to ensure even distribution and proper operation of all components.
c. Maintenance:
- Inspection: Regularly check sprinkler heads for clogs and ensure they are properly aligned.
- Cleaning: Clean sprinkler nozzles and filters to maintain optimal performance.
- Repairs: Fix leaks and replace damaged components as needed.
· Advanced Systems and Controls:
a. Automation:
- Timers and Controllers: We provide and install timers or automated controllers to schedule irrigation cycles based on weather conditions and soil moisture.
- Sensors: We use soil moisture sensors and weather sensors to optimize irrigation scheduling and water usage.
b. Integration:
- Centralized Control: For larger systems, consider integrating irrigation controls with a central management system for efficiency and ease of operation.
- Remote Monitoring: Implement remote monitoring systems for real-time updates and adjustments.
· Testing and Calibration:
- System Testing: Test the entire system to ensure all components are functioning correctly and that water distribution is uniform.
- Calibration: Adjust and calibrate the system to ensure it meets the designed water requirements and optimizes efficiency.
· Ongoing Maintenance:
- Regular Inspections: Schedule regular inspections to ensure the system remains in good working condition.
- Seasonal Checks: We conduct seasonal checks to prepare the system for changes in weather and water availability.
11. COMMERCIAL AND RESIDENTIAL BUILDINGS MAINTENANCE:
· Preventive Maintenance:
a. Routine Inspections:
- Structural Integrity: We regularly inspect the building’s structure, including foundations, walls, and roof, for signs of damage or deterioration.
- Mechanical Systems: Our team check HVAC systems, elevators, and other mechanical systems for performance and potential issues.
- Plumbing and Electrical Systems: Our experts inspect plumbing fixtures, pipes, electrical panels, wiring, and outlets for leaks, wear, or faults.
b. HVAC Systems:
o Installation and Maintenance:
- Filter Replacement: Regularly replace air filters to ensure efficient operation and good air quality.
- Duct Cleaning: Clean air ducts periodically to remove dust and allergens, improving air flow and system efficiency.
- System Checks: Perform routine maintenance on HVAC systems, including checking refrigerant levels, inspecting components, and testing system performance.
c. Plumbing Systems:
o Installation and Maintenance:
- Pipe Repairs: Repair or replace leaking, damaged, or corroded pipes and fittings.
- Fixture Maintenance: Maintain and repair plumbing fixtures such as faucets, toilets, and sinks to ensure proper function and prevent leaks.
- Water Heater Maintenance: Inspect and service water heaters, including flushing the tank to remove sediment and checking for proper operation.
d. Electrical Systems:
o Installation and Maintenance:
- Wiring Inspection: Regularly inspect electrical wiring and connections for signs of wear, damage, or overheating.
- Outlet and Switch Repairs: Repair or replace malfunctioning outlets, switches, and circuit breakers.
- Lighting Maintenance: Replace bulbs and fixtures as needed. Ensure that all lighting systems are functional and energy efficient.
e. Roofing:
o Roof Inspections: Our experts inspect the roof for damage, such as missing shingles, cracks, or leaks. Address issues promptly to prevent further damage.
- Exterior and Interior Finishes:
- Painting and Sealing: Repaint and seal exterior surfaces to protect against weathering and deterioration. Refresh interior paint and finishes as needed.
- Surface Repairs: Repair damaged or worn surfaces, such as drywall, plaster, or flooring. This includes patching holes, replacing tiles, and fixing scratches or dents.
g. Safety and Security Systems:
- Fire Protection Systems: Install and maintain fire alarms, sprinklers, and extinguishers. Conduct regular fire drills and system checks.
- Security Systems: Install and service security systems, including surveillance cameras, alarms, and access control systems.
h. Accessibility and Compliance:
- Accessibility Features: Ensure that accessibility features, such as ramps, elevators, and handrails, are in good condition and compliant with local regulations.
- Building Code Compliance: Regularly review and update building systems and installations to ensure they meet current building codes and standards.
i. Landscaping and Outdoor Maintenance:
- Landscaping: Maintain outdoor areas, including lawns, gardens, and hardscapes. This involves mowing, pruning, and weeding.
- Irrigation Systems: Install and service irrigation systems to ensure efficient watering of landscaping.
j. Energy Efficiency:
- Insulation: Install and maintain insulation in walls, roofs, and floors to improve energy efficiency and reduce heating and cooling costs.
- Energy Audits: Conduct energy audits to identify areas for improvement and implement measures to enhance energy performance.
k. Documentation and Handover:
- Maintenance Records: Keep detailed records of all maintenance activities, including inspections, repairs, and replacements.
- Handover: Provide documentation and maintenance instructions to building managers or owners. Include information on warranties, service schedules, and contact details for service providers.
l. Emergency Repairs:
- Response Plan: Develop and implement an emergency response plan for unexpected issues, such as leaks, power outages, or structural damage.